How do I add and edit shapes?
Use the rectangle shape to add a background color to your
item or layer different shapes behind your text for a fun header.
To add a shape:
- From the left panel in the Drag and Drop editor, click Shapes.
- Double-click on the shape to add it to your item. Or drag the shape to your items with your mouse, making sure your mouse cursor is over the item when you release your mouse.
To edit the size and position of a shape:
- Click on the shape to select it.
- Use the handles in the corners to resize the shape.
- Move your shape to position it in your item.
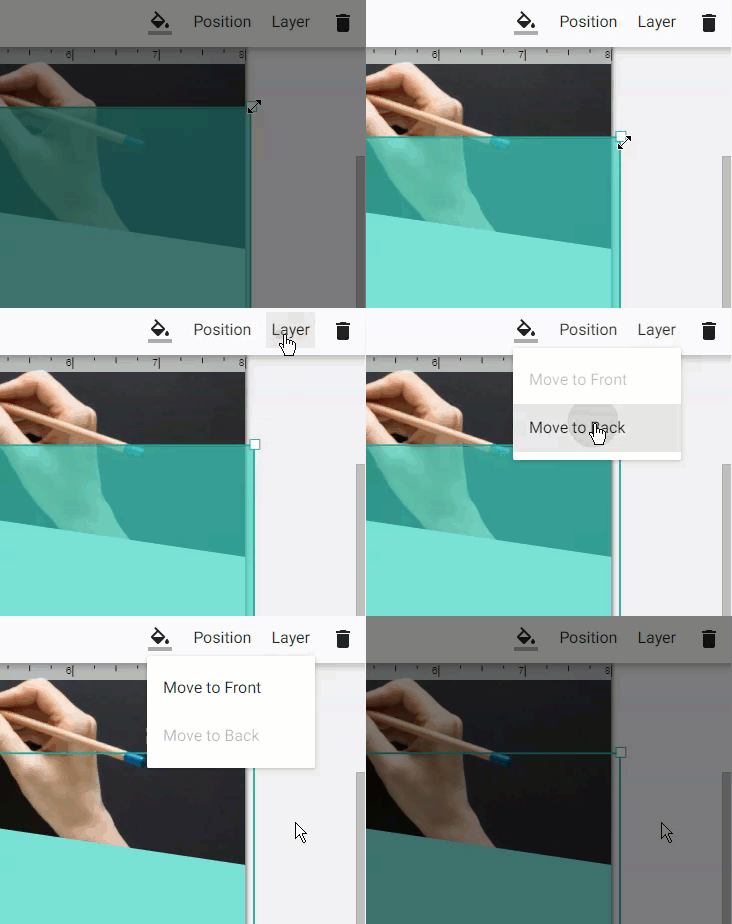
- In the top-right corner under the editor toolbar, click the Layer button. Click the Move to Back option to move the shape behind all other elements in your item. If you want the shape to appear behind a text box, click on the text box and select Move to Front from the Layer menu.
- Click outside of the shape to release the shape layer.

To edit the color of a shape:
- Click on the shape to select it.
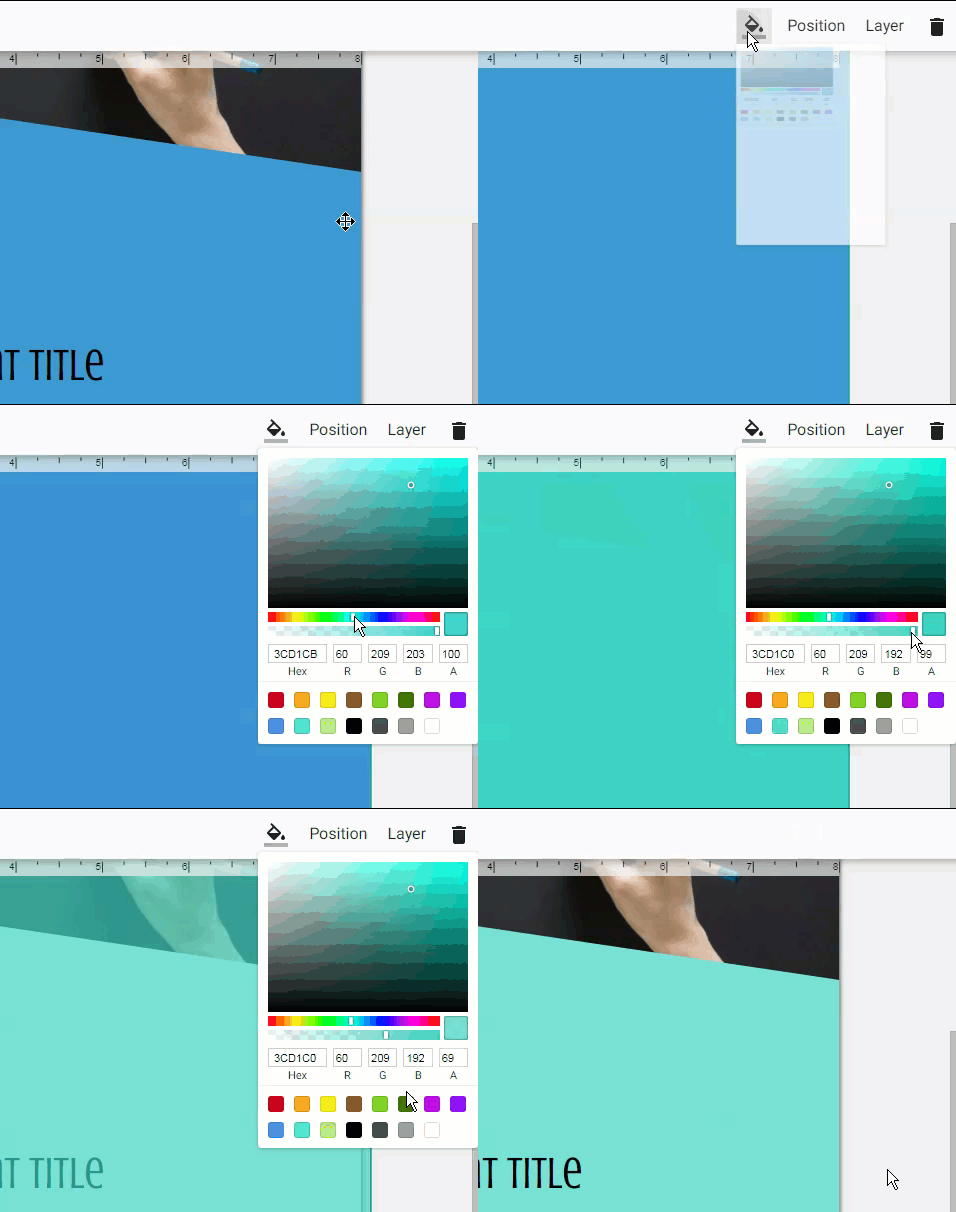
- Click the Fill Color button.
- Select a color for the shape. You can enter the Hex or RGB values.
- Use the slider underneath the color selection to change the opacity.
- Click outside of the item to release the shape layer.

To add LibraryAware-designed graphics (shapes, lines or backgrounds) to your item:
- From the editor's left panel, click the Images option.
- Double-click on the Images to add it to your item. Or drag the Images option to your item with your mouse, making sure your mouse cursor is over the item when you release your mouse.
- From the image selector window, search "shape," "background," or "line."
- Click Select Image under the image that you would like to add.
- Use the handles in the corners to resize the shape.
- Move your shape to position it in your item.
- In the top-right corner under the editor toolbar, click the Layer button. Click the Move to Back option to move the shape behind all other elements in your item. If you want the shape to appear behind a text box, click on the text box and select Move to Front from the Layer menu.
- Change the opacity by clicking the Opacity link. Use the slider to adjust the opacity.
Ready to get creative? Use shapes to create your own design:
- From the Shapes menu, drag a shape into the editing space and change the color. To make the shape uniform, open the Position menu and change the values to the same for Width and Height. To distort it, make the values different.
- Drag in other shapes and change their colors to build a new object.
- To add transparency to a shape, click the paint bucket icon and move the slider to the left to get the desired opacity, or enter a value less than 100 in field A.
- By adding more shapes and adjusting the opacity, you can create unique imagery or icons.

